Mapping The Dead

Skull and Crossbones

I’ve seen a lot of interesting mapping applications in the news over the last year. One that’s caught my attention is cemetery mapping. I had never really thought about just how ideal a cemetery is to be mapped. Each plot has a distinct spatial location. They have measurable attributes like occupant, location, depth and width. They are often laid out like a grid or a table but sometimes (especially on older properties) they are spread out seemingly without much thought to being easily located again.

Locating a plot is obviously the most important attribute for cemetery mapping. Caretakers have to be able to determine where a body is located so they can avoid accidentally digging it up when placing another body. Relatives of the deceased want to know where their family members are too so they and those in the future can find them again.

One of the first articles I cam across last year was about the cemeteries in the City of Mackinac Island Michigan. The city’s cemetery committee (I bet those meetings are fun) recognized that its current data holdings (hand-drawn paper maps, incomplete lists of cemetery residents and the memories of senior committee members who are increasingly ending up in the cemetery themselves) were not adequate. So they started mapping out plots using GPS and building a database of names.

The City of Mackinac Island Cemetery Committee hopes to have a completed digital mapping system by next June, which will help the city clerk’s office keep track of plots and burials more efficiently. The map is one of many updates the city is considering relating to its cemeteries and burial policies.

It didn’t surprise me to find that some cities are using GIS technology to keep track of cemeteries. What did surprise me was the number of software packages that have been created for mapping and managing them. A quick search for cemetery mapping software reveals several pages of apps, services and companies with interesting names like Memorial Business systems, CemMapper and The Crypt Keeper.

Yet with all of these software solutions, none of the cemeteries that I was interested in searching had detailed mapping of their plots. Only one even had a website. Although the mapping technology is there, this kind of project doesn’t seem like one many cemeteries are willing to undertake.

Why Gulp is Great

In my last post I talked about why I started and then stopped using Grunt. Basically, Grunt seemed too slow and my workflow was being halted too often while I waited for it to build. There are several other task running/app building tools out there (Broccoli, Cake, Jake…) but I decided to try Gulp first since it has a large user base and there are plenty of plugins out there to keep me from having to think too much.

At first, Gulp didn’t seem quite as straightforward as Grunt. Grunt was easy to use. You just had to write (sometimes lengthy) configuration objects for the plugins you wanted to run and then fire off the tasks using the command window. Even someone like me could figure out how to add a source file and a destination location to a minification plugin and be reasonably sure I would get a minified file out of it.

It was also very easy to visualize what your Gruntfile was doing because every task plugin worked independently of the rest. You would configure ten different tasks and then register them all together in a row and expect them to run one after another until they all completed.

With Gulp, you don’t just configure plugins, you write JavaScript code to define your tasks and how you want them run. A Gulp task asks you to require the plugins you want to use, or write a custom task using plain old JavaScript, then call Gulp.src to provide a source file for the tasks to run on. Doing this opens a Node stream which keeps your source object in memory. If you want to run one of the task plugins you required at the top of your script, you simply pass the in-memory object to it by calling the .pipe() method. You can continue piping the object from one task to another until you’re finished. Finally, you call Gulp.dest and provide a destination location.

var gulp = require('gulp');
var plumber = require('gulp-plumber');
var addsrc = require('gulp-add-src');
var less = require('gulp-less');
var cssnano = require('gulp-cssnano');
var concatCss = require('gulp-concat-css');
var rename = require('gulp-rename');
var concat = require('gulp-concat');
var uglify = require('gulp-uglify');
var watch = require('gulp-watch');

gulp.task('less', function(){
    return gulp.src('./source/style/style.less')
        .pipe(plumber())
        .pipe(less())
        .pipe(cssnano())
        .pipe(addsrc.append(['./source/style/anotherStyleSheet.min.css', './source/style/stillAnother        StyleSheet.min.css']))
        .pipe(concatCss('concat.css'))
        .pipe(rename("style.min.css"))
        .pipe(gulp.dest('./destination/style/'));
});

gulp.task('js', function(){
    return gulp.src(['./source/scripts/javaScript.js'])
        .pipe(plumber())
        .pipe(uglify({
            mangle: false,
        }))
        .pipe(addsrc.prepend(['source/scripts/someJSLibrary.min.js', 
        'source/scripts/anotherJSFile.min.js','source/scripts/stillAnotherJSFile.min.js']))
        .pipe(concat("all.js"))
        .pipe(rename("finalFile.min.js"))
        .pipe(gulp.dest('./destination/scripts/'));
});

gulp.task('default', ['less', 'js'] , function() {
gulp.watch(['./source/style/style.less']);
gulp.watch(['./source/scripts/javaScript.js']);
});

The great thing about using Node streams is that you don’t have to keep opening and closing files for each task like in Grunt. This lack of i/o overhead makes running a series of tasks very fast. Even so, you really need to use the built-in watch task to take advantage of this speed. In my experience, running a default task with four or five tasks in it, from the command line, was almost as slow as in Grunt. With the watch task running, it only took milliseconds to rebuild what it needed to. But I’m new to Gulp so what do I know?

You can see in the code above that I used several plugins to manipulate the input file as it is piped down the stream. There are two that I found particularly helpful. The first is Gulp-Plumber which is basically a patch that keeps streams from being un-piped when an error is encountered. Supposedly, streams breaking on error will be fixed in version 4.0.

The second helpful plugin here is Gulp-Add-Src which does exactly what the title says. You can add additional source files to your stream so you can do neat things like concatenation. With these and other plugins I haven’t found anything with Gulp that would keep me from doing everything I could with Grunt.

The only thing I really don’t like about Gulp is the icon. It’s a cup with a straw in it and the word Gulp across its side. A cup by itself indicates an ability to gulp what is in it. But you don’t gulp through a straw, you sip or suck. Who wants their product to suck? And sip indicates a lack of passion. So what’s with the straw?

Gulp.js cup icon

Why Grunt is Gone From My Build Team Lineup

I have to admit, I don’t always research every option when I’m looking for a solution to a problem. I’ll usually start out with a broad web search to see what others are using and if their solutions seem to fit my situation. Then I’ll take maybe the top two solutions and try to implement them. The first one that serves all of my requirements and is relatively easy to implement usually becomes my solution.This is exactly how I came to start utilizing Grunt as a build tool for a large web mapping application I develop.

When I first started using Grunt, the JavaScript API development team at ESRI was using it for their projects. Lots of other developers were using it too and I didn’t know any better than to follow. A few people were talking about Gulp too as an alternative to Grunt. So I took a brief look at Gulp, didn’t immediately understand it, then started putting together my Grunt configuration file and collecting all the plugins I needed.

What can I say – it worked great and I was happy that I wasn’t still using code minifiers and copying files by hand to production folders. When I started using Adobe Brackets as my default code editor, I was pleased to find it had a great Grunt plugin to integrate task running directly.

Things were great for a while but I was always bothered by how long Grunt took to run through all my tasks and complete my build. It would take 10+ seconds to finish and I would have to sit there waiting to check my latest edits. It can be really hard to develop a piece of code when you are constantly halting your flow.

However, I was lazy and didn’t want to have to learn another tool. What I had in place worked,  just not efficiently. But eventually I knew something had to change. Strangely, it wasn’t inefficiencies with Grunt that made me dump it, it was Brackets. My Brackets install was slowing down and freezing at inopportune times, like whenever I wanted to use it. I was also getting the Brackets “white screen of death” from time-to-time which required the Task Manager just to shut the program down. So now I was waiting 30 seconds for my editor to unfreeze so I could wait 10 seconds for my task runner to finish.

The upshot is, I revisited Atom and am now using it as my default editor. Fortunately, I wasn’t happy with Atom’s Grunt integration. I figured it was a great time to jump ship and try again with the second biggest player in the JavaScript task running world: Gulp.

In my next couple of posts I’ll talk more about why Gulp is great and why I shouldn’t have nuked Atom when I was first choosing a new editor.

Building a Stubborn Driver: An Ubuntu Adventure

I was confused, frustrated and defeated. My back was on fire and I could barely feel my legs. If there had been a bed within range I would have crawled in, closed my eyes and tried to forget the last five hours I had sat trying to build Linux drivers for my son’s new USB wireless adapter. It didn’t work. Nothing was working!

Wireless Adapter
Now I’m no Linux expert but I can usually figure out how to make the OS do what I need it to do. In this case it should have been simple – just make and install the source files and maybe change some setting on another file. But things went wrong from the beginning.
It was Saturday and I anticipated getting the project done fairly quickly. I had actually tried to get the WiFi working the day before but I was trying to do it without a wired connection to help out. I had just installed Ubuntu 14.04.03 and I really didn’t think I would have any trouble.

The open source drivers that come with Ubuntu take care of most of the hardware I want to use. But this particular wireless adapter was a plug-in USB with a proprietary driver that had to be compiled by hand. The adapter came with one of those mini-cds. It had three folders with drivers for Linux, Windows and Macs.

The windows and mac folders had exactly one file that you can click on to load the driver. I’ve used this adapter on a windows box and it works really well. All you have to do to get it working is double-click the executable and away you go. On Linux you have to build the driver from source code. So we’ve gone from one .exe file to about 450 files that you have to figure out how to put together and get to work. OK, but this is Linux. That’s what you expect from an open source OS.

But even building drivers shouldn’t be that difficult if you know basic Linux commands, how to traverse directories, edit files and use Make. Still, with such a large user and contributor base (for Ubuntu) you would think someone would have made the process for this driver a little clearer. Here are the build instructions that came with the adapter:

Build Instructions:  
====================

1> $tar -xvzf DPB_RT2870_Linux_STA_x.x.x.x.tgz
    go to "./DPB_RT2870_Linux_STA_x.x.x.x" directory.
    
2> In Makefile
	 set the "MODE = STA" in Makefile and chose the TARGET to Linux by set "TARGET = LINUX"
	 define the linux kernel source include file path LINUX_SRC
	 modify to meet your need.

3> In os/linux/config.mk 
	define the GCC and LD of the target machine
	define the compiler flags CFLAGS
	modify to meet your need.
	** Build for being controlled by NetworkManager or wpa_supplicant wext functions
	   Please set 'HAS_WPA_SUPPLICANT=y' and 'HAS_NATIVE_WPA_SUPPLICANT_SUPPORT=y'.
	   => #>cd wpa_supplicant-x.x
	   => #>./wpa_supplicant -Dwext -ira0 -c wpa_supplicant.conf -d
	** Build for being controlled by WpaSupplicant with Ralink Driver
	   Please set 'HAS_WPA_SUPPLICANT=y' and 'HAS_NATIVE_WPA_SUPPLICANT_SUPPORT=n'.
	   => #>cd wpa_supplicant-0.5.7
	   => #>./wpa_supplicant -Dralink -ira0 -c wpa_supplicant.conf -d

4> $make
	# compile driver source code
	# To fix "error: too few arguments to function ¡¥iwe_stream_add_event"
	  => $patch -i os/linux/sta_ioctl.c.patch os/linux/sta_ioctl.c

5> $cp RT2870STA.dat  /etc/Wireless/RT2870STA/RT2870STA.dat
    
6> load driver, go to "os/linux/" directory.
    #[kernel 2.4]
    #    $/sbin/insmod rt2870sta.o
    #    $/sbin/ifconfig ra0 inet YOUR_IP up
        
    #[kernel 2.6]
    #    $/sbin/insmod rt2870sta.ko
    #    $/sbin/ifconfig ra0 inet YOUR_IP up

7> unload driver    
    $/sbin/ifconfig ra0 down
	$/sbin/rmmod rt2870sta

I started by simply trying to make the driver according to the instructions above. But the process kept showing an error and acting like it couldn’t find certain files that should have either been included or created when the make command was run. So I went searching “How to compile RT2870STA driver”. There were a lot of sites giving basic instructions about how to build the driver and it seemed like it should work fine. What I didn’t notice were the dates of most of these articles. They were pre 2010.

I finally came across a newer post that explained this driver was built with an earlier Linux kernel in mind (2.x). In the 3.x kernel, some functions that are referenced by my driver source files were re-named! Then I finally did what I should have done from the very beginning: I got specific. I searched “How to compile RT2870STA on Linux 3.19 kernel”. This seemed like a god idea at the time. In fact, it yielded a great blog post that provided a patch that supposedly would fix the discrepancy in the driver files. But for the life of me, I couldn’t even get that to run.
It was at that point I became too frustrated and defeated to continue. My entire day had been wasted. My kids were complaining that they hadn’t seen me all day. My wife was giving me that concerned “Oh dear, he’s trying to do smart people things again” look. Even my dog seemed annoyed at me that I had spent more time typing “make install” than I had spent throwing her ball.

So I gave up and took a few days away from my little project and did some other tasks that were just slightly easier for me like taking out the garbage. Then, Saturday morning I thought why not give it one more try? So I searched “How to compile RT2870STA on Ubuntu 14.04.03”. It was like magic! The very first result was a post on ubuntuforums.org that explained everything in a few simple steps. It seems there were two functions that had been renamed in newer builds of Ubuntu. I had to edit a file in one of the driver folders and change the names of a couple functions. I then ran Make again and voila, my adapter was up and running.

Looking back I realize I’ve learned (and re-learned) a lot about working with Linux. I now have much better terminal skills. I understand driver compilation processes better and how they interact with the kernel. I also reinforced my belief that an Ethernet connection to the internet is always superior to wireless, although inconvenient.

Search Directory Trees with Python

Here is a simple but powerful way to use Python to search and find all files with a specific extension within a given folder and all of its sub-folders using os.walk(). I use it a lot to find map documents with broken data sources, images that need to be organized or just to get a quick count of certain files in a directory.

import os

directorypath = raw_input("Enter a directory path: ")
extension = raw_input("enter an extension: .")

#Loop through all folders and subfolders in your target directory. 
for root, dirs, files in os.walk(directorypath):
    fileList = [os.path.join(root, f) for f in files if f.endswith(extension)]             
    for item in fileList:
        print item #or do something else with each file found.


When Django Met IIS

The Problem:

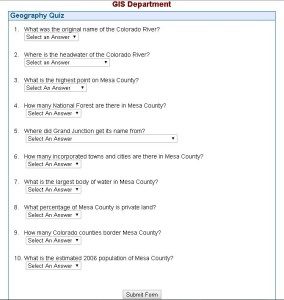
The county I work for had a one page geography quiz with outdated questions and a poorly structured user interface. It was just an unstyled list of select dropdowns and a submit button. The answer page that was returned just listed each question with all the answer choices under them. One answer under each question was highlighted in yellow but it wasn’t made clear to the user whether this was the correct answer or just the answer they chose.

Old Mesa County quiz app.To compound things, the quiz was stuck in an enterprise CMS that gave it a really ugly url. I wanted to change that so it would look good and be really easy to understand. Thankfully I wasn’t restricted to any particular language or technology stack to build the new quiz.

The Solution:

A few years back I had played around with Django and thought it was a cool framework but I had never really applied it to any project. So I said to myself “why not?” and set out to build a new geography quiz app with Django. Over the next couple of days I put together the components of the new application:

  • A PostgreSQL database to store the questions and answers
  • Models to define the data in the database
  • Views to process and send the data and to route user answers to the answer page
  • Templates to render the data

Everything seemed to be going along smoothly although I wasn’t very happy with the way I wrote my views to handle the user submitted answers. The app basically builds a form on the fly (questions with radio button answers) then does a POST when the quiz taker clicks the submit button. The view then takes the POST data and turns it into a Python list. The rest of the view just slices and dices the list and uses offsets to pull out the matching questions and answers.

I know there are cleaner ways of doing this. Especially since the returned POST data is a querydict object which is basically just a Python dictionary. Manipulating key/value pairs seems neater. But the way I did it worked and I got it up and running fast. Maybe a project next time I’m bored will be to make the code cleaner and more maintainable.

Another Problem:

Remember earlier when I said that I asked myself “why not?” when considering using Django? Well, I was about to answer that question and the answer wasn’t pretty.

While I was developing my quiz app I used Django’s built-in server which is a lightweight “please don’t use in production” server. It worked great. Then I decided it was time to port the app to my production server and actually use it in the real world. At that point I remembered we use IIS on a Windows server.

IIS isn’t all bad, especially if you work in a place that uses .NET components heavily which I do. Unfortunately, Django was never really developed to run on IIS. Django was really designed to live in a Unix world and be served out with something like Apache. I remembered that from my prior experience with the platform – I just forgot.

Another Solution:

There are several tutorials on the web (most of them several years old) that discuss running Django under IIS but none of them were very straight-forward. The solution that seemed like the quickest route to a running app was to use Helicon’s Python Hosting Package (part of the Helicon Zoo repository available through the IIS Web Package Installer). The hosting package basically loads all of your dependencies and does all of the complicated work of getting IIS to run an antagonistic technology. You then load a Python Project module which builds everything for you including:

  • A virtual Python install specific to your app
  • A web config file with needed environment variables
  • Permissions and application pool settings

The only pain point I had with using Helicon’s solution was discovering it doesn’t work with Django 1.7. I had developed in 1.7 and then when I migrated into the Helicon environment everything broke. This really threw me for a loop for a while until I found a post suggesting using Django 1.6. This didn’t turn out to be a big deal as it didn’t affect my apps functionality. I just had to remove a couple of middleware classes from my settings file and I was good-to-go.

New Mesa County Quiz AppConclusion:

I love working with Django. If I wasn’t in a Windows environment I might be trying to use it throughout my office GIS site. But I can’t see trying to force uncommitted technologies into a relationship they don’t even seem to want. I guess Django is just going to be a hobby framework for me for now. Fortunately there are plenty of others out there just waiting to be learned and implemented.

Brackets – My New Favorite Code Editor

Brackets IDE symbol.A couple of months ago I started searching for “the best” code editor for web development. I wanted to see what was out there and how it compared to what I have used and was currently using.

Since most of my co-workers live in the .NET world I have access to Visual Studio, which I actually like as an IDE. I’ve used it to do a good deal of development over the last couple of years. But I wanted to explore more of what was out there for code editors that might be more lightweight, fun and available wherever I might want to use it (work, home, on the road…).

For web and desktop work at home I’ve used Notepad, Notepad ++ and Aptana and have never been really happy.

Notepad ++ actually works really well but I hate the interface (it’s boring and ugly rolled into one). Besides, it would be nice to use something platform independent for portability. On the plus side (sorry), in Notepad ++ you can configure styles and keyboard mappings and there;s a lot you can do with the preferences to make things work the way you want them to.

That’s actually the story with the majority of editors and IDEs out there today. Most of them have customizable settings and functionality either built-in or available through plug-ins or extensions. Some of them are geared toward specific languages or uses but most of them seem to handle the most common languages.

No Magic Bullet

I’ve come to the conclusion that there is no “best” editor. There are only ones with fewer annoyances than others. Out of the editors I have been trying lately there are a few I have only used for a few seconds (like Atom) and some I’ve done some heavy lifting with (like Sublime Text). My favorite so far has been Brackets, the open source project from Adobe.

Brackets

I really like the look and feel of Brackets. It has a nice flat design. It doesn’t overwhelm you with controls and menus. But that led me to pause and question – where are all the controls and menus? It turns out, a lot of your customizations are done directly through json files or through extensions. That’s great because I love working in json.

Changing the keymap is not as straight-forward as most code editors and IDEs but it is intuitive and simple. You just have to override the default mappings in the keymap.json file. I set up my block and single line mappings because the defaults almost always annoy me.

I’ve been using Brackets both at work and at home. In my home setup I use the live preview feature all the time. It’s only available through Chrome which is not a problem for me. I usually like to debug my HTML, JavaScript and CSS in Firefox (Firebug) but the Chrome developer tools work just fine for most things. Live preview is great because the Chrome page refreshes automatically every time you save your HTML file. I have a different setup at work which doesn’t allow for the live preview to work but I might be changing that soon.

Brackets really shines with its extensions manager. This is where you can install/uninstall user created extensions or Brackets themes. You can also search Github for extension, download the zip file and drag the zip right into the extension manager. It only took a few minutes to search for and install a few extensions to make development easier. These included Grunt, indent guides, code folding and code beautification(formatting).

I have notices some of the extensions can slow Brackets way down so that’s something to watch as you’re loading new ones up. Now I’m just looking for a reason to create an extension of my own or some reason to hack Brackets itself.

Shapefile as a Multi User Editing Environment?

I had a ArcGIS user that I support come to me with a corrupted shapefile the other day. It had the old “number of shapes does not match number of table records” error. It turns out, he’s still using this shapefile as his layer’s main data source and he and several others regularly edit it! In this day and age?

I tried to convince him using a file geodatabase would be more stable for editing but he had been using shapefiles so long I don’t even think my comments registered. He just wanted a tool that could fix the shapefile.

I pointed him to the shapechk tool by Andrew Williamson. I’ve used the tool for years because <sarcasm>for some odd reason</sarcasm> I often run into people with corrupted shapefiles after people edit them over long periods of time. The shapefile works OK as a data exchange format but doesn’t always hold together under regular heavy use.

In the words of Pete Seeger, “when will we ever learn?”

Are Linkedin Background Photos Worth the Trouble?

With Linkedin allowing background photos for your profile you now have one more way to express yourself creatively on the platform. But Linkedin isn’t Facebook. It’s a professional network and is typically understood to have professionally presented profiles. Having a clean, flat layout with a simple blue and grayscale color scheme has helped keep Linkedin profiles in line with that strategy.

Before background photos the worst offense a user could do visually was insert Homer Simpson as their profile picture. Now we are given the power to screw up a much larger portion of our profile’s real estate.

Is it worth possibly reducing the professional look of your profile just to “express” yourself on one more social channel? Or is it worth the time and effort it will take to produce an image that will still project the professionalism that a plain background already does? The answer to both of these questions is – probably not. I doubt that a connection, employer or recruiter will give a second thought to your profile header not having some sort of graphic behind it. A good head shot as your profile picture will, however, still be expected.

But that doesn’t mean that you absolutely shouldn’t use a background photo. If an image is well thought-out and conveys important information upfront to someone viewing your profile, it could be very worthwhile. Putting in a picture of balloons, sunsets or your dog will probably only serve to distract viewers. However, a picture of you speaking at an event gives the impression that you’re an expert in your field and have experience with public speaking. Likewise, a picture of a map might strengthen the profile of a cartographer or GIS professional.

When someone views your profile, your title and profile picture are usually the first things they see. As we all know, first impressions can make a real impact. If you can influence that first impression positively, then the extra profile eye-candy could be an asset.

I’m still on the fence about whether to put a background photo on my own Linkedin profile page. At this point in time I think Linkedin background photos are a bit of a risk for both Linkedin and its users. While profile customization can make your page look nice, it also runs the risk of making it look like a wannabe Facebook page. That’s not in keeping with the feel of Linkedin. If you do decide to add a background photo, keep it simple and above all, relevant to the rest of your profile.

C is for Crash

There are those moments when you realize that certain sports just aren’t worth it. I spotted this encouraging sign in a pile of old junk while hiking a local ski resort in the off season. It does encourage me not to crash but mostly by convincing me not to take up skiing.

Cookie Monster with Broken Arm


I wonder how long it took for someone to realize that instilling terror in your patrons isn’t a good marketing ploy.