How to Change a Github Repository Language

I created a new Github repository today for a Node/Express project at work. After pushing the project code I went to Github and saw that the language for the project was listed as CSS. To be fair to Github, I did style my app with CSS. But as it’s a Node app, I expected to see the JavaScript tag instead.

It turned out the third-party image gallery library I was using had much larger files than anything I was writing. Github’s Linguist library picked up on the larger files and used those to extrapolate CSS as the dominant technology in the app. I still don’t entirely understand why, since the library’s JavaScript files were three times the size of its CSS files.

Now I needed a way to change what the language tag said. Unfortunately, Github doesn’t give you a good way to do this. The Linguist library does give you options to ignore files from third parties though. Here’s how you do it:

  1. Create a .gitattributes file at the root of your local repository.
  2. Inside the .gitattributes file, type a path to the containing folder holding your third-party code. At the end of the path type “/*”. 
  3. After the path type “linguist-vendored”. Here is the example from the Linguist troubleshooting section: 
    special-vendored-path/* linguist-vendored

    Save your file, commit it and push it to your remote Github repository.

This takes the third-party code out of consideration for the Linguist algorithm. Once you refresh your Github page the language tag should be different. If the language still doesn’t match what you think it should, try adding the “linguist-vendored” tag to other folders to reduce the types of files Linguist searches.

Use Yarn in Place of npm

Condensed version of This Post

Use Yarn in place of npm: Workflows don’t change; Packages load faster; Consistent node_module structure.

yarn init = npm init
yarn install = npm install
yarn add [package] = npm install [package] --save
yarn add [package] --dev = npm install [package] --save-dev
yarn remove [package] = npm uninstall [package]


Longer Version of This Post

npm is currently king of the Node package managers. Yarn is an alternative package manager that tries to fix what could be problems for some npm users. Yarn provides faster load times, dependency consistency and shorter commands, all within the same workflow you are used to with npm.


Installation and Use

If you already use npm, install Yarn with npm install yarn -g . That’s it! You can now use the yarn commands just like you would with npm. If you feel silly installing npm’s replacement with npm you can download an installer instead. Use your existing package.json file or create a new one with yarn init . Run yarn add [package]  to install new package dependencies . Removing installed packages is as easy as yarn remove [package] . Install all of the dependencies of an existing project using yarn install,or even just yarn .


Deterministic Package Installs

Deterministic Package Installs is a fancy way of saying: The same module dependencies will be installed with the same structure on any machine using yarn. The structure of dependencies in the node_modules directory can be different from machine to machine when using npm. This can potentially cause a dependency to work on one machine but break on another.

Speed

Yarn installs packages faster than npm. Yarn starts by comparing a dependency against what’s already in the global yarn cache. If there’s no package cache, the package is downloaded and placed in cache. Once all dependencies are cached, yarn copies all necessary files only once to the project’s node_modules directory.


Downloaded and cached packages don’t need to be re-downloaded in the future. If you nuke your node_modules folder and run yarn install  again, your dependencies will be copied from the cache into your new node_modules directory very quickly. If you start a new project somewhere else on the same machine, only dependencies that have never been used elsewhere are downloaded. The rest are pulled from the cache and merged with the downloaded ones. This makes for a very fast load.

Conclusion

Do you really need to use Yarn? Of course not. Lot’s of people use npm for their projects with little problem. But on projects where dependencies have to be installed separately among several users, module consistency could become a problem. Yarn solves this and provides other great enhancements to npm. Yarn provides a similar use experience to npm. It provides all the same packages, is faster and has simpler commands. It can even tell you why a package is being used. There are few if any downsides and you can always go back to npm.

5 Ways to Comment Your JSON

Comments aren’t part of the official JSON specification. According to an old (2012) Google Plus post by Douglas Crockford, he removed them to preserve interoperability.  But that same post suggests you can still use comments  so long as you remove them through minification before parsing.

There are a few other ways to handle JSON comments besides minification:

  1. You can add a new data element to your object. The element key would be named  “_comment_” or something similar. The value would be the actual comment. This method is slightly intriguing but feels kind of dirty. It looks like a hack. It is a hack! bulk is also added to the network payload. JSON is a lightweight data exchange. Adding comment elements takes away from this.
  2. Use Scripts that programmatically remove comments from your JSON before it’s parsed. Sindre Sorhus published a comment stripping module which does just that. This is similar to Crockord’s method of minification in that it removes the comments before parsing but you can inline it in your code rather than use it during a build process.
  3. You can forget comments in your JSON entirely. Put comments in the code where you make the data request in the first place. You should already know what kind of returned data is expected so comments would make sense here. You can stay in your code without the need to view a separate file. This makes your code easier to understand.
  4. Finally, if JSON is being used as a configuration file or some other static data store, you might even try commenting it in a separate file. Put a text README in the same directory the configuration file is stored. The README could contain a paragraph describing the data or you could copy the JSON into the README and use inline comments.

There are several ways to take care of the problem of commenting JSON files. All have their strengths and weaknesses. The best method depends on your particular situation and needs.

Why Gulp is Great

In my last post I talked about why I started and then stopped using Grunt. Basically, Grunt seemed too slow and my workflow was being halted too often while I waited for it to build. There are several other task running/app building tools out there (Broccoli, Cake, Jake…) but I decided to try Gulp first since it has a large user base and there are plenty of plugins out there to keep me from having to think too much.

At first, Gulp didn’t seem quite as straightforward as Grunt. Grunt was easy to use. You just had to write (sometimes lengthy) configuration objects for the plugins you wanted to run and then fire off the tasks using the command window. Even someone like me could figure out how to add a source file and a destination location to a minification plugin and be reasonably sure I would get a minified file out of it.

It was also very easy to visualize what your Gruntfile was doing because every task plugin worked independently of the rest. You would configure ten different tasks and then register them all together in a row and expect them to run one after another until they all completed.

With Gulp, you don’t just configure plugins, you write JavaScript code to define your tasks and how you want them run. A Gulp task asks you to require the plugins you want to use, or write a custom task using plain old JavaScript, then call Gulp.src to provide a source file for the tasks to run on. Doing this opens a Node stream which keeps your source object in memory. If you want to run one of the task plugins you required at the top of your script, you simply pass the in-memory object to it by calling the .pipe() method. You can continue piping the object from one task to another until you’re finished. Finally, you call Gulp.dest and provide a destination location.

var gulp = require('gulp');
var plumber = require('gulp-plumber');
var addsrc = require('gulp-add-src');
var less = require('gulp-less');
var cssnano = require('gulp-cssnano');
var concatCss = require('gulp-concat-css');
var rename = require('gulp-rename');
var concat = require('gulp-concat');
var uglify = require('gulp-uglify');
var watch = require('gulp-watch');

gulp.task('less', function(){
    return gulp.src('./source/style/style.less')
        .pipe(plumber())
        .pipe(less())
        .pipe(cssnano())
        .pipe(addsrc.append(['./source/style/anotherStyleSheet.min.css', './source/style/stillAnother        StyleSheet.min.css']))
        .pipe(concatCss('concat.css'))
        .pipe(rename("style.min.css"))
        .pipe(gulp.dest('./destination/style/'));
});

gulp.task('js', function(){
    return gulp.src(['./source/scripts/javaScript.js'])
        .pipe(plumber())
        .pipe(uglify({
            mangle: false,
        }))
        .pipe(addsrc.prepend(['source/scripts/someJSLibrary.min.js', 
        'source/scripts/anotherJSFile.min.js','source/scripts/stillAnotherJSFile.min.js']))
        .pipe(concat("all.js"))
        .pipe(rename("finalFile.min.js"))
        .pipe(gulp.dest('./destination/scripts/'));
});

gulp.task('default', ['less', 'js'] , function() {
gulp.watch(['./source/style/style.less']);
gulp.watch(['./source/scripts/javaScript.js']);
});

The great thing about using Node streams is that you don’t have to keep opening and closing files for each task like in Grunt. This lack of i/o overhead makes running a series of tasks very fast. Even so, you really need to use the built-in watch task to take advantage of this speed. In my experience, running a default task with four or five tasks in it, from the command line, was almost as slow as in Grunt. With the watch task running, it only took milliseconds to rebuild what it needed to. But I’m new to Gulp so what do I know?

You can see in the code above that I used several plugins to manipulate the input file as it is piped down the stream. There are two that I found particularly helpful. The first is Gulp-Plumber which is basically a patch that keeps streams from being un-piped when an error is encountered. Supposedly, streams breaking on error will be fixed in version 4.0.

The second helpful plugin here is Gulp-Add-Src which does exactly what the title says. You can add additional source files to your stream so you can do neat things like concatenation. With these and other plugins I haven’t found anything with Gulp that would keep me from doing everything I could with Grunt.

The only thing I really don’t like about Gulp is the icon. It’s a cup with a straw in it and the word Gulp across its side. A cup by itself indicates an ability to gulp what is in it. But you don’t gulp through a straw, you sip or suck. Who wants their product to suck? And sip indicates a lack of passion. So what’s with the straw?

Gulp.js cup icon

Why Grunt is Gone From My Build Team Lineup

I have to admit, I don’t always research every option when I’m looking for a solution to a problem. I’ll usually start out with a broad web search to see what others are using and if their solutions seem to fit my situation. Then I’ll take maybe the top two solutions and try to implement them. The first one that serves all of my requirements and is relatively easy to implement usually becomes my solution.This is exactly how I came to start utilizing Grunt as a build tool for a large web mapping application I develop.

When I first started using Grunt, the JavaScript API development team at ESRI was using it for their projects. Lots of other developers were using it too and I didn’t know any better than to follow. A few people were talking about Gulp too as an alternative to Grunt. So I took a brief look at Gulp, didn’t immediately understand it, then started putting together my Grunt configuration file and collecting all the plugins I needed.

What can I say – it worked great and I was happy that I wasn’t still using code minifiers and copying files by hand to production folders. When I started using Adobe Brackets as my default code editor, I was pleased to find it had a great Grunt plugin to integrate task running directly.

Things were great for a while but I was always bothered by how long Grunt took to run through all my tasks and complete my build. It would take 10+ seconds to finish and I would have to sit there waiting to check my latest edits. It can be really hard to develop a piece of code when you are constantly halting your flow.

However, I was lazy and didn’t want to have to learn another tool. What I had in place worked,  just not efficiently. But eventually I knew something had to change. Strangely, it wasn’t inefficiencies with Grunt that made me dump it, it was Brackets. My Brackets install was slowing down and freezing at inopportune times, like whenever I wanted to use it. I was also getting the Brackets “white screen of death” from time-to-time which required the Task Manager just to shut the program down. So now I was waiting 30 seconds for my editor to unfreeze so I could wait 10 seconds for my task runner to finish.

The upshot is, I revisited Atom and am now using it as my default editor. Fortunately, I wasn’t happy with Atom’s Grunt integration. I figured it was a great time to jump ship and try again with the second biggest player in the JavaScript task running world: Gulp.

In my next couple of posts I’ll talk more about why Gulp is great and why I shouldn’t have nuked Atom when I was first choosing a new editor.

Search Directory Trees with Python

Here is a simple but powerful way to use Python to search and find all files with a specific extension within a given folder and all of its sub-folders using os.walk(). I use it a lot to find map documents with broken data sources, images that need to be organized or just to get a quick count of certain files in a directory.

import os

directorypath = raw_input("Enter a directory path: ")
extension = raw_input("enter an extension: .")

#Loop through all folders and subfolders in your target directory. 
for root, dirs, files in os.walk(directorypath):
    fileList = [os.path.join(root, f) for f in files if f.endswith(extension)]             
    for item in fileList:
        print item #or do something else with each file found.


When Django Met IIS

The Problem:

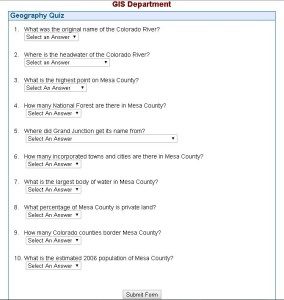
The county I work for had a one page geography quiz with outdated questions and a poorly structured user interface. It was just an unstyled list of select dropdowns and a submit button. The answer page that was returned just listed each question with all the answer choices under them. One answer under each question was highlighted in yellow but it wasn’t made clear to the user whether this was the correct answer or just the answer they chose.

Old Mesa County quiz app.To compound things, the quiz was stuck in an enterprise CMS that gave it a really ugly url. I wanted to change that so it would look good and be really easy to understand. Thankfully I wasn’t restricted to any particular language or technology stack to build the new quiz.

The Solution:

A few years back I had played around with Django and thought it was a cool framework but I had never really applied it to any project. So I said to myself “why not?” and set out to build a new geography quiz app with Django. Over the next couple of days I put together the components of the new application:

  • A PostgreSQL database to store the questions and answers
  • Models to define the data in the database
  • Views to process and send the data and to route user answers to the answer page
  • Templates to render the data

Everything seemed to be going along smoothly although I wasn’t very happy with the way I wrote my views to handle the user submitted answers. The app basically builds a form on the fly (questions with radio button answers) then does a POST when the quiz taker clicks the submit button. The view then takes the POST data and turns it into a Python list. The rest of the view just slices and dices the list and uses offsets to pull out the matching questions and answers.

I know there are cleaner ways of doing this. Especially since the returned POST data is a querydict object which is basically just a Python dictionary. Manipulating key/value pairs seems neater. But the way I did it worked and I got it up and running fast. Maybe a project next time I’m bored will be to make the code cleaner and more maintainable.

Another Problem:

Remember earlier when I said that I asked myself “why not?” when considering using Django? Well, I was about to answer that question and the answer wasn’t pretty.

While I was developing my quiz app I used Django’s built-in server which is a lightweight “please don’t use in production” server. It worked great. Then I decided it was time to port the app to my production server and actually use it in the real world. At that point I remembered we use IIS on a Windows server.

IIS isn’t all bad, especially if you work in a place that uses .NET components heavily which I do. Unfortunately, Django was never really developed to run on IIS. Django was really designed to live in a Unix world and be served out with something like Apache. I remembered that from my prior experience with the platform – I just forgot.

Another Solution:

There are several tutorials on the web (most of them several years old) that discuss running Django under IIS but none of them were very straight-forward. The solution that seemed like the quickest route to a running app was to use Helicon’s Python Hosting Package (part of the Helicon Zoo repository available through the IIS Web Package Installer). The hosting package basically loads all of your dependencies and does all of the complicated work of getting IIS to run an antagonistic technology. You then load a Python Project module which builds everything for you including:

  • A virtual Python install specific to your app
  • A web config file with needed environment variables
  • Permissions and application pool settings

The only pain point I had with using Helicon’s solution was discovering it doesn’t work with Django 1.7. I had developed in 1.7 and then when I migrated into the Helicon environment everything broke. This really threw me for a loop for a while until I found a post suggesting using Django 1.6. This didn’t turn out to be a big deal as it didn’t affect my apps functionality. I just had to remove a couple of middleware classes from my settings file and I was good-to-go.

New Mesa County Quiz AppConclusion:

I love working with Django. If I wasn’t in a Windows environment I might be trying to use it throughout my office GIS site. But I can’t see trying to force uncommitted technologies into a relationship they don’t even seem to want. I guess Django is just going to be a hobby framework for me for now. Fortunately there are plenty of others out there just waiting to be learned and implemented.

Installing Setuptools and PIP for Python

Python logoI’ve installed a lot of Python packages over the years using Distutils, SetupTools/easy_install and PIP. Distutils is Python’s built-in package distribution module and is pretty easy to use. However, it has some limitations, primarily that you have to manually download the package dependencies and there is no method to uninstall packages.

The Setuptools easy_install script takes care of downloading packages and package dependencies but still lacks certain features you would want from a fully functioning package manager. It doesn’t provide version control support, package tracking and uninstallation. There is a lot more to the Python package discussion but there is no point in bringing it up.

Anyway, while I use package distribution tools I rarely have to install the tools themselves since they only get loaded once. When I do have to set up a new machine or upgrade someone elses, I always forget the steps to get Setuptools and PIP installed. So I thought I would document the steps here. Now I just have to remember to come back here when I need them.

 Installing Setuptools:

1. Right click on this ez_setup.py link and save the file to your Python Scripts folder (If you have ArcGIS loaded you will usually find this at C:\Python27\ArcGIS10.x\Scripts).

2. Open a command prompt and change into the SCRIPTS directory.

3. Type

python ez_setup.py

then hit enter to execute the code. This will run the script which will download and install setuptools on your system.

For the official installation instructions for setuptools, which includes instructions for installing on Windows 8 with Powershell visit https://pypi.python.org/pypi/setuptools.

Installing PIP:

1. Open a command prompt and change into the C:\Python27 directory.

2. Type

easy_install pip

then hit enter to execute. Pip should now be installed on your system.

To actually install a package using PIP from a command prompt you simply type

pip install "PackageName"

and everything will be taken care of for you. To explore the more than 54,000 packages that are available for Pip to load visit PyPI – the Python Package Index.

Use Python to Keep Your Brain Sharp

“Use it or lose it” certainly applies where brain function is concerned. The experts tell you to exercise your brain to keep it in shape and ward off forgetfulness and possibly dementia when you are older.

One way to exercise your brain is to do computations in your head. Not long ago I read a book called The Power of Forgetting by Mike Byster that introduced several tricks and methods for doing these mental computations. One that stuck with me was how to multiply two, two-digit numbers in your head. Here’s an excerpt from the book explaining how to do it:

addnumbersThere are probably easier ways to do mental multiplication but Byster’s method is meant to be an exercise in remembering and forgetting numbers at will to make your brain stronger.

I wanted to find a way to challenge myself with the above multiplication method on a regular basis. My solution was to write a very small Python script that would generate random two-digit by two-digit multiplication problems and display them on screen. Here is what I came up with:

from random import randint
from ctypes import windll

firstNumber = randint(10,99)
secondNumber = randint(10,99)

problem = str(firstNumber) + " x " + str(secondNumber)
answer = str(firstNumber*secondNumber)

windll.user32.MessageBoxA(0, problem, "Can you multiply these in your head?", 0)
windll.user32.MessageBoxA(0, "The answer is: " + answer, "How did you do?", 0)

The script simply generates two random two-digit numbers, displays them to the user, then displays the correct answer when the user closes the first message box. I used Python’s ctypes library to create Windows message boxes,so you would need to make some adjustments if you wanted to use it on a different operating system. I also set up my task scheduler to run the script automatically every hour. Now, throughout the day at work and at home I’m reminded to exercise my mind in a way I wouldn’t normally exercise it.

Five Things I Love About the ESRI Javascript API

Having worked with both the ArcGIS Silverlight and Javascript APIs I have to say Javascript has been much more fun. There is just something about working on the front end of a web map and being able to have it do so many amazing things. Here are my top five reasons I enjoy working with this API.

1. Your maps are device independent. Unlike the Flex and Silverlight APIs, Javascript and HTML5 can be viewed on almost any device. The obvious advantage here is that you can reach more people with your spatial data.  Of course having the ability to code for multiple devices means having to customize your code for different screen sizes which can turn into a lot of work. Check out this post from the Treehouse Blog for a great primer on responsive web design.

2. Plenty of code samples and live examples. Code samples are a great way to get your own map up and running quickly without having to figure everything out first. While the samples are not perfect they are a good way to discover map functionality that you might want to incorporate.

3. Support for a ton of layer and data formats. From GeoRSS and GeoJSON to KML and shapefile, this API pretty much covers it.

4. Well written API reference documentation. If you are going to use an API (any API) you want to be able to understand it so you can use it effectively. Good documentation is critical for this. The Esri JS API is (in my own humble opinion) extremely easy to read and understand. Each class has all the information you need to use it without having to decode any meanings. Furthermore, there are links from each class to samples that use it.

5.  Editing tools for online editing of SDE data. Let’s be honest, online editing through a web browser is not a great idea if you are trying to build accurate data. However, there is definitely a place for it. If you are trying to outline an area inhabited by a herd of elk or mark an area of weed infestation, browser editing is probably fine.  It is great just to be able to have this ability so more diverse mapping applications can be developed.

Wow, this list was a lot harder to write than 5 Things I Hate About the ESRI Javascript API. One reason is that there are other APIs out there that do a lot of what the ESRI API does (yes I am thinking about OpenLayers). Another reason is that as I write I think about things I would like ESRI to do better or differently. Oh well, you can’t have everything. Let me know what your thoughts are on the ESRI Javascript API – good or bad.