Old Mapping Site Reviews

Back in 2012 I put together a list of five mapping/GIS sites and apps that I thought were interesting. I typed them up, posted them and then forgot about them. Now, six years later I found them and checked to see what their status is. Amazingly, most of the sites are still up and running in one form or another.

I guess I feel a little validated that the sites I thought were of high enough quality to share back then turned out to be high enough quality to last as long as they have. It’s not uncommon for projects like these to start off with promise only to soon be relegated to the internet archive. You can check out the original post 5 Nifty Maps from StumbleUpon and see the screenshots as they were when I took them in 2012. Otherwise, here is the list, updated six years later.

The Maps

ZoomEarth – Here is a nifty little satellite imagery viewing application. When I first found this site, Zoom Earth was called Flash Earth. Its claim to fame was that it was a Flash based alternative to Google Earth. Of course Flash has gone the way of the Dodo across most parts of the internet so at some point the app was changed to Zoom Earth. It now claims to have new satellite imagery every day. It’s cool to zoom into an area and scroll through different dates of imagery for the place. However, if you get in close enough to actually see anything useful, the option to change the date goes away. 

Wikimapia – Wikimapia is a weird entity somewhere between Google Maps and OpenStreetMap. You can upload your own information about geographic places and objects. It’s been around since 2006 but it still has a 2012 copyright. I’m thinking the site doesn’t get much love except a yearly domain renewal.


Maps Of War – This site doesn’t seem to have change much since I first looked at it. Half of the maps deal with the Middle East and the Iraq War. The maps are still flash based so it looks like nothing is really updated. But, at least it still exists. 

IRIS Seismic Monitor – The Seismic Monitor is the graphic interface for seismological data from The Incorporated Research Institutions for Seismology consortium. It’s an interesting app if you’re into earthquakes. Even if you aren’t excited by shaking dirt, the colored map markers are pretty.

Worldology.com – Not too long ago, this site was up. Now it’s not. If you still want to check out some of the old flash based maps from the site you can see them over on the Internet Archive. Hey, four out of five still isn’t bad.


It’s Always Been Broken

Sometimes, when debugging an error that has just popped up in a program, the problem lies in some external parameter that has recently changed. Most of the time, however, the thing that has changed only serves to reveal how some static code had a dormant bug already. The code can work under one set of parameters but not another. Either way, it has always been broken.

Creating a Simple Hamburger Menu Icon

A while back I was updating a web app that was targeted to desktop users. I wanted to make it more mobile friendly. One of the ways I did this was by changing the layout on different size screens. The app had a toolbar header that I wanted to collapse into a single icon on mobile devices.

On a lot of mobile apps this single icon takes the form of a hamburger menu. Whether you love this icon or hate it, it’s somewhat ubiquitous so I decided to use it. I wanted a simple version of the icon that when clicked would open an overlay to display the tools the header does on a desktop.

I was able to craft a very simple menu icon using a very small html skeleton and a tiny bit of CSS. Basically it’s an <a> tag with three spans inside. I used an <a> tag but you could just as easily use a <div> or any number of other elements. The spans are given height and width dimensions and a solid bottom border via CSS.


See the Pen Stacked Navigation Menu by Ryan Davison (@ryandavison) on CodePen.

That’s about it. If you want to play around with different approaches to your own icon you can edit this code on codepen.

It’s The Little Things That Get You

I spent some time today dealing with a layer of data that was added to an ESRI REST service. The service layers are zero base indexed which means you can reference them based on their position relative to each other. The first layer is identified at position zero while the second is 1, the third is 2 and so on.

The new layer was just before the fourth existing layer. This means the new layer became the fourth, the fourth became the fifth and the fifth became the sixth. Are you following along?


Anyway, I was working on a web app that consumes this service and it references the service layers based on those index positions. I added some new markup and some code for the added layer and changed the existing code to reference their two new position numbers. At first everything seemed to be working fine. Then a coworker noticed that the new layer’s data was showing on screen by default (you’re supposed to check a box first). It took me a while before I finally realized that it was being controlled by a different checkbox that controls the layer right after it in the service.

To make an already long and confusing story shorter, there was a second reference to the service indexes in my code. When I had designed the app a few years ago I, for some reason, found it expedient to make two, hard coded references to the index. Instead of taking the time to create a variable, I had repeated a hard coded number that could be changed by an outside source.

My poor design choice came back to bite me. Not only did I repeat code, I made it confusing to update. It’s embarrassing to admit that I wrote code that even I couldn’t figure out later. But it goes to show that taking the time to design things correctly from the start will pay off in the future. It’s the little things that get you; that second hard coded index number that’s nearly impossible to notice.

Future Proofing a Technology Career

Is it possible to “future proof” a career in technology?  An article yesterday by IDG Connect proposes that to future proof your technology career you should learn “cyber security, business intelligence, data science/big data, DevOps, JavaScript and UX/UI development and design”.

Their suggestions are based on the fact that these domains are in high demand right now. But the must have technology today may be the forgotten technology of tomorrow. Basing your career on a single language or specialty almost ensures your skill set will become obsolete.

Specializing in a given tech field or becoming proficient in a particular programming language isn’t bad. But you shouldn’t base your entire career on it. A better approach is to gain broad knowledge in computer technology or programming and supplement that with specific expertise. That way when the language of the day changes or the cyber security field is saturated with employees, you’ll be able to shift to the new tech need easier and with more authority.

But there might be an even better way to avoid technology skills obscurity. In his book You Can Do Anything, author George Anders suggest that the key to securing a long lasting place in the work world is to develop skills that might be completely unrelated to what you think you should learn. The book’s premise is that a liberal arts degree could be the key to securing high paying jobs in a number of career fields including technology.

Anyone can learn a programming language. Anders says it’s “nothing that can’t be picked up in a few months of concentrated effort”. But it takes a different skill set to think creatively and apply technology training to the problems companies face. Liberal arts degrees can give you those different skill sets.

They can help you develop creative and critical thinking, communication and obtuse analysis skills among other things. My own political science degree solidified my analytical abilities and taught me how to look beyond seemingly obvious answers to problems and find solutions with more permanent outcomes. And it was my interest in political theory and intelligence that led me to a career in geographic information systems.

Having a computer science degree doesn’t doom you. Science degrees still produce some of the primary skills tech employers are looking for. But if you want to guarantee your place in today’s ever changing world of technology, hone your soft skills. Carve your own niche by looking outside of technology for the skills businesses are looking for in their best employees.

Objective Reasoning – The Basic Javascript Object

What is an Object?

In Javascript an object is simply a container or store of properties that are related to what the object is modeling. These properties can be primitive data types, other objects or functions. Here’s an example of an empty object with no properties:

const furBearingTrout = {};

I’ve used object literal notation which is doing just what it sounds like – literally writing out the notation of an object. We do this using curly braces {}.

How to create properties

When we want to set a property on our object we can do it one of two ways:
1. Use bracket notation where we state the object name along with a property name in brackets and then assign a value using the equal sign:

furBearingTrout[“name”] = ‘Alpino-Pelted’;
furBearingTrout[“url”] = 'http://www.furbearingtrout.com/fish2.html';

2. Use dot notation where we state the object name followed by a dot followed by the property name we want to use and then assign a value using the equal sign:

furBearingTrout.name = ‘Alpino-Pelted’;
furBearingTrout.url= 'http://www.furbearingtrout.com/fish2.html';

I could have created our object with properties already assigned. Note that properties are written as name:value pairs separated by commas.

const furBearingTrout = { 
  name: ‘Alpino-Pelted’, 
  url: 'http://www.furbearingtrout.com/fish2.html'
}

How to access properties

Once we have properties we can access them using the same two methods we used to set them just without the equal signs that assign values.

console.log(furBearingTrout.name); //outputs ‘Alpino-Pelted’
console.log(furBearingTrout[‘url’]); //outputs 'http://www.furbearingtrout.com/fish2.html'

We can also create objects using the constructor method (new Object) or the Object.create() method but for this article we’ll stick to the literal notation for its simplicity and visual aid.

Functions in objects are methods

When the property is a function we call it a method. Methods do something with the data stored in the object. Imagine we had the following properties:

const furBearingTrout = {
  name: ‘Alpino-Pelted’,
  url: 'http://www.furbearingtrout.com/fish2.html',
  view: function () {
    console.log(`View the ${this.name} trout at ${this.url`;)
    }
}

You call a method by accessing the property name it’s associated with followed by parentheses.

furBearingTrout.view(); //ouputs ‘View the Alpino-Pelted trout at http://www.furbearingtrout.com/fish2.html

Why do I use ‘this’ ?

The ‘this’ keyword simply references the very object it’s inside of. So this.name is the same as saying neighbor.name. Outside of the object we would refer to furBearingTrout.name but inside the object we refer to this.name.

There’s a lot more to objects than what I’ve written here. But if you understand these basics you’ll already be able to model some fairly complex real world data and be able to manipulate it.

A Little Background on Map Elements

The problem

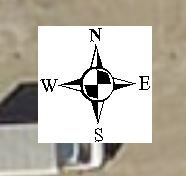
If you’ve ever had to place map elements like north arrows, text or scalebars on an ArcGIS made map, you know how they can get lost in the background of imagery or some other basemap. You can always try to change the items color or size to make it stand out. But the easier and more effective method is to change its background color to a solid color like white.

Compass Rose
Map elements can get lost in the noise.

The problem with doing that is the background extent only stretches to the edges of its element. There is no padding between the element edge and the background edge.  Thankfully, ArcMap provides us with the ability to set a gap between the two edges.

Compass rose with white background.
Default backgrounds on map elements have no padding.

How to fix it

In ArcMap, right-click or double-click on the element to open its properties. Open the Borders and Background tab and select your backround color from the dropdown. Next, change the X and Y values next to “Gap”. The higher the number, the more padding you’ll get between element and background edge. You can also apply a “Rounding” percentage value to give your background panel rounded corners. That’s all it takes to make your ArcGIS map easier to read and more professional looking.

Map elements.
Adjusting background gap gives elements room to breathe.

The Integrated Developer’s Environment

I was home sick from work the other day and had plenty of time to think. It occured to me that whenever I go in to the office I am very productive almost immediately. When I’m home, I tend to have little enthusiasm for programming. When I attempt to program at home I’m usually nowhere near as productive as at the office.

It hasn’t always been that way. When I lived in Las Vegas I wrote code at home on a regular basis. My immediate thought was that I don’t currently have the right hardware to be productive at home. In Las Vegas I had a decent desktop PC with two monitors and a hardwired internet connection. I currently have an old, slow laptop that shares a wireless connection among several people and lots of devices.

But is it really the hardware that holds me back? Most of my work is done in JavaScript which can be written with lightweight text editors/IDEs (I use Atom these days). I don’t need a lot of computing power for that. Honestly, my high-end rig at work is mostly for large imagery datasets and working with GIS.

I started realizing that it’s less the hardware and software that impacts my productivity and more the intended use of those things. When I go to the office, I use that computer for work. My home computer is used for surfing the web, writing emails and watching Netflix. When I sit down at it, my brain switches to mindless mode. I find myself wandering, checking email or googling things that pop into my mind.

So it’s less the development environment and more the developer’s environment that inluences his productivity. In my Las Vegas home I had set up my computer in a separate room and only really used it for programming. We had a separate laptop (the same one I have now) for web surfing and intertainment. For me, I have to have a psychological, if not physical, separation between work (anything that takes concentration and thought) and play. I would like to spend some time working on some open source projects on the weekends so it looks like I’m going to have to carve out some space in the house or a dedicated office.

Chrome Developer Tools

As a JavaScript developer I need tools that help me figure out what’s going on between my code and the browser. Thankfully, most major browsers today provide developer tools that do just that.
Google Chrome toolbox.
With these tools you can see exactly how your code affects the browser. At runtime you can find errors in code you’ve written or how long your site takes to load. You can view or even rewrite your CSS rules to see what changes will look like before you ever even commit them to your source files.
You can also dig into the browser itself and inspect its cookies, local storage and cache. And with web users quickly transitioning to mobile devices, developer tool device emulation can show what your site looks like on, and how it will interact with, phones and tablets.
Every year that passes gives us better developer tools from the major browser makers. We are fast coming to a point where any tool you choose will be just as good as another. But for one reason or another developers tend to find themselves gravitating towards a particular set of tools.
When I surf the web I like to use more privacy oriented browsers like, well, anything but Google’s Chrome. But when it comes to debugging and developing code, Chrome takes first place in my world. I like the default look of the Chrome tools UI (although Mozilla’s Dark theme is slightly more pleasant to look at if you’re into dark themes). I also find Firefox developer tools to be a little slow when emulating mobile devices while Chrome is snappier. Other tools in Chrome also appear more polished and have more functionality.

Some browser developer tools might have features that others don’t but that’s usually only true until the others release their next version. Good ideas tend to spread themselves around quickly.
There are lots of tools out there for JavaScript developers and web designers. But Chrome’s developer tools provide great runtime debugging, design assistance and performance insights. If you’re a web developer and are not using these tools and features to the fullest, it’s worth taking the time to dive deep.

How to Change a Github Repository Language

I created a new Github repository today for a Node/Express project at work. After pushing the project code I went to Github and saw that the language for the project was listed as CSS. To be fair to Github, I did style my app with CSS. But as it’s a Node app, I expected to see the JavaScript tag instead.

It turned out the third-party image gallery library I was using had much larger files than anything I was writing. Github’s Linguist library picked up on the larger files and used those to extrapolate CSS as the dominant technology in the app. I still don’t entirely understand why, since the library’s JavaScript files were three times the size of its CSS files.

Now I needed a way to change what the language tag said. Unfortunately, Github doesn’t give you a good way to do this. The Linguist library does give you options to ignore files from third parties though. Here’s how you do it:

  1. Create a .gitattributes file at the root of your local repository.
  2. Inside the .gitattributes file, type a path to the containing folder holding your third-party code. At the end of the path type “/*”. 
  3. After the path type “linguist-vendored”. Here is the example from the Linguist troubleshooting section: 
    special-vendored-path/* linguist-vendored

    Save your file, commit it and push it to your remote Github repository.

This takes the third-party code out of consideration for the Linguist algorithm. Once you refresh your Github page the language tag should be different. If the language still doesn’t match what you think it should, try adding the “linguist-vendored” tag to other folders to reduce the types of files Linguist searches.